Creating projects
All the centron resources in your account are initially stored in a single default project. You can create additional projects and move resources between them to organise your resource structure in a way that suits your working methods and usage.
Prerequisites
- Access to the centron Control Panel
Creating a project in Control Panel
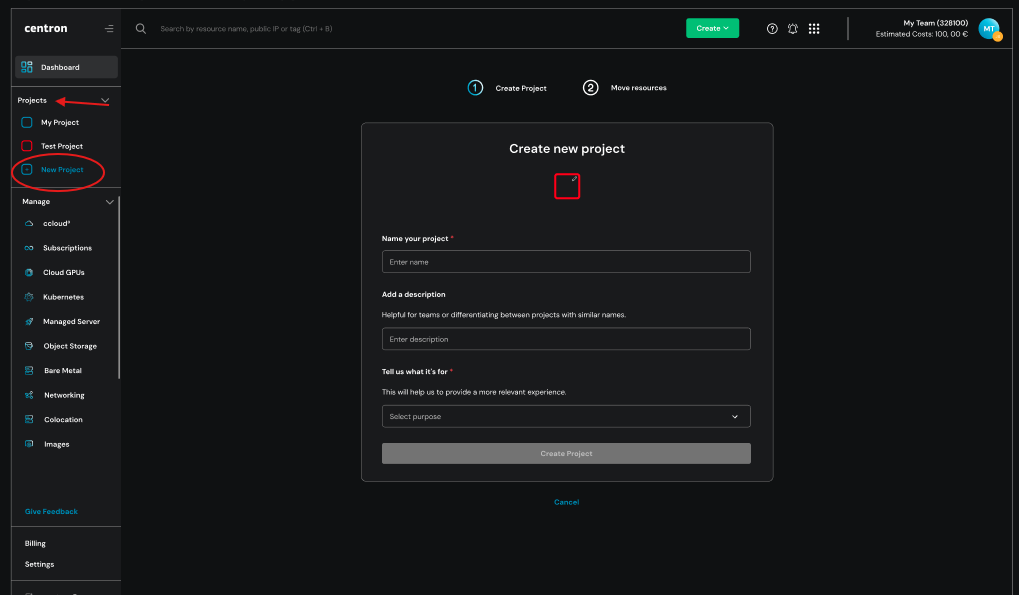
In Control Panel, open the Projects section in the main menu on the left-hand side, below the ‘Dashboard’ heading, and click + New Project to open the first screen for creating a project.
On the Create new project page, enter the name, description and purpose of the project. You can change the project settings at any time by opening the Settings section again later, clicking on the relevant project and then selecting the Settings section there.
-
Project name (required field): The name is designed to be easy to read. Spaces and special characters are therefore permitted.
-
Description (optional): A description of your project is entirely optional. It may be particularly useful for your Teams, for example, to distinguish between projects with the same name.
-
Purpose / Intended use (Required field): This information helps us display relevant tips and tutorials for your specific use case. You can select a purpose from the list or choose ‘Other’ and enter your own description.
By clicking on the coloured border within the creation screen, you can assign a unique border to each project. This makes it easier to tell the projects apart afterwards:
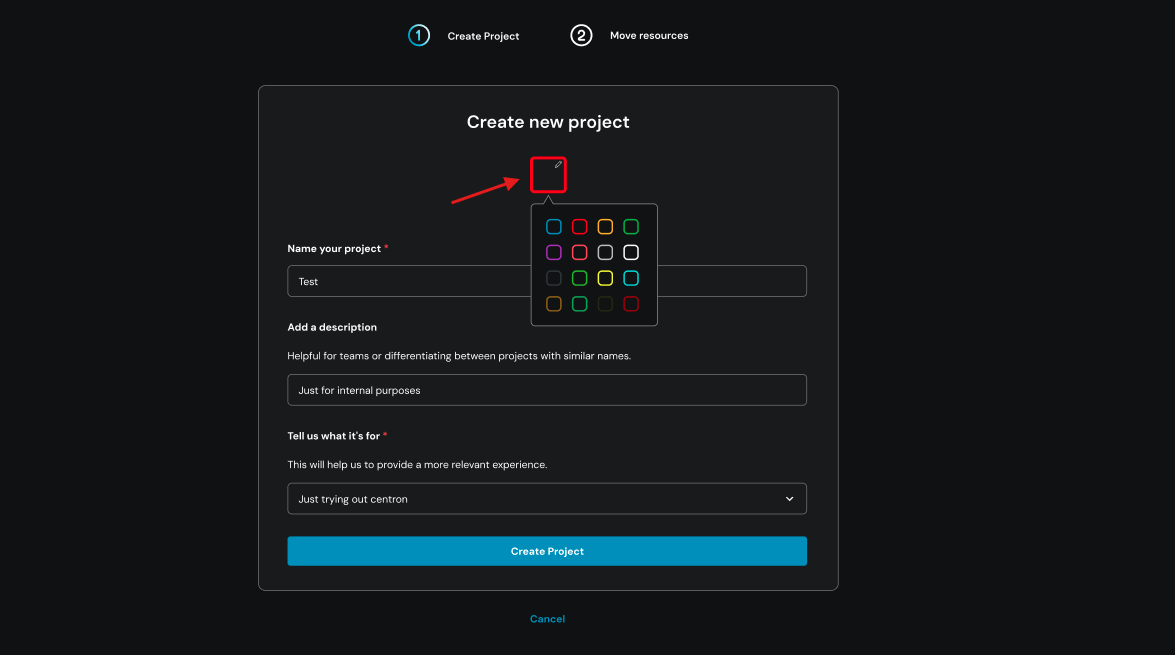
Next, click on Create Project to proceed to the second step, Move Resources. There, you can optionally transfer existing resources to the new project. To do this, start by entering the name of the relevant resource and select the correct one by clicking on it – you have now successfully added your resource to the project.
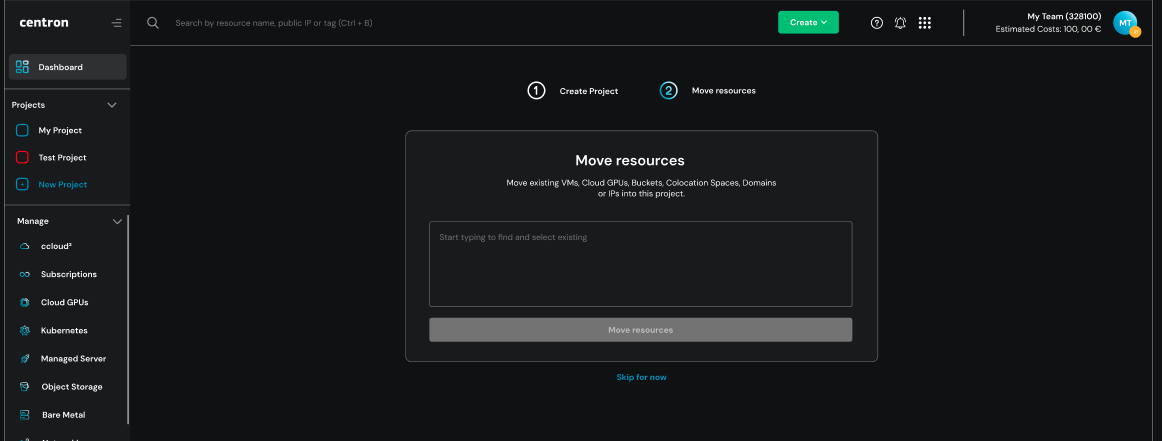
If you do not wish to move any resources at this stage, select Skip for now and assign the resources later.
Whichever option you choose, the project creation process will be completed and you will be automatically redirected to the Resources tab of the new project. There, the assigned resources are displayed, grouped by type.