Generating keys with PuTTY
To create and use SSH keys on Windows, you will need PuTTY and PuTTYgen. PuTTY is a tool for establishing SSH connections to remote servers, whilst PuTTYgen is used to generate SSH keys. Here is a guide on how to set them up and use them:
Downloading and installing PuTTY and PuTTYgen
-
Download:
Visit the PuTTY website and download the .msi file from the "Package files" section under "MSI ('Windows Installer')".
-
Installation:
Install the file on your local computer by double-clicking it and following the installation wizard.
Creating SSH keys with PuTTYgen
-
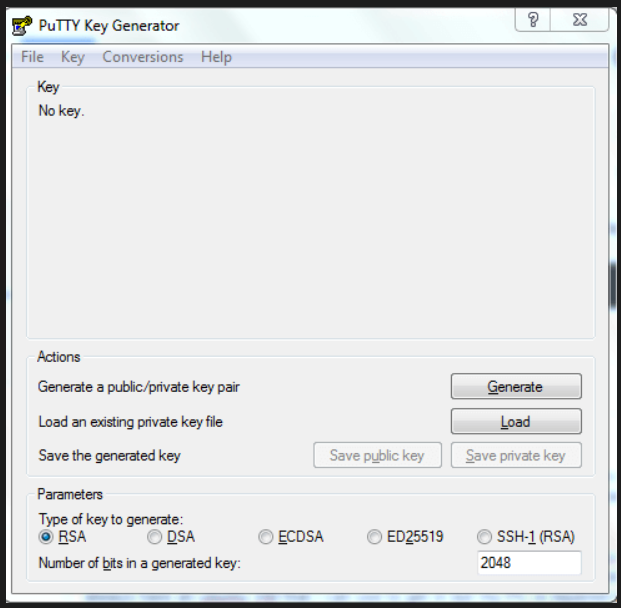
Launch PuTTYgen:
Open the programme via the Start menu or by typing "puttygen" after pressing the Windows key.
-
Parameters:
You can adjust the parameters at the bottom, although the default values are usually sufficient. For Fedora 33, select ECDSA or another supported algorithm due to new encryption requirements.
-
Generate key:
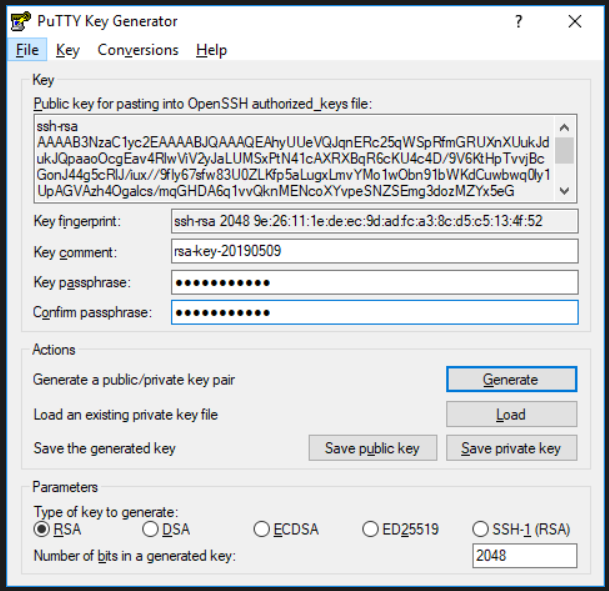
Click on ‘Generate’ and move your mouse over the empty area to generate randomness (entropy) for secure key generation.

-
Copy the public key:
Once the key has been generated, the public key will be displayed in a text box. Copy it to your clipboard.
-
Enter passphrase:
Enter a passphrase for your SSH key. This enhances security, as no one can use your private key without also knowing the passphrase.
-
Save private key:
Click on "Save private key" and choose a secure location. The .ppk file extension will be added automatically.
Working with the PuTTY public key format
The format of the public key saved by PuTTYGen is not compatible with the OpenSSH authorized_keys files used for SSH key authentication on Linux servers.
If you need the public key in the correct format:
- Load the private key into PuTTYgen.
- The public key will be displayed again in the appropriate format.
Next steps
Add a public key to your centron account:
Add your public key to your centron account so that you can embed it in new ccloud³ VMs when they are created.
Adding a public key to existing ccloud³ VMs:
Add your public key to existing ccloud³ VMs to use SSH key authentication for logging in.